A design blog to capture a collection of thoughts from a bowerbird who is in love with unique design - fashion, furniture, art, photography, interiors, jewellery and creative minxes


Monday, November 29, 2010

One organised studio = one super quick DIY skirt!

I love the floral skirts that are gracing the pages of fashion mags this season so I thought I’d make my own!

This skirt was made in 3 hours. I found the fabric at Lindcraft for $14 per metre and I only needed about 80cm. Essentially, it’s just a rectangle with shirring for the waistband with a tie!

Supplies:
Material (my fabric was 145cm wide so I only needed just under a metre)
Shirring elastic
Lightweight interfacing
Cotton

Simple steps
1) Measure the size of your waist and double it to get the fabric width you are going to use (I used an existing skirt to figure out my size)
2) I wanted a waist band that would sit up so I interfaced 10cm for the waist band
3) Wind the shirring elastic onto the bobbin
4) Shirr 4 rows of elastic where you want the waist to pull in
5) Sew up the back seam which should give you a circle and let your skirt take shape
6) Make a tie – mine was 6 cm wide. I gave the tie ends mitered edges and I finished with a top stitch.
7) Hem to desired length
FINITO!

P.s. On Saturday I found a perfect storage unit for all my crafting supplies at Bunnings ($190) – for more info check out my facebook fan page…..

Sunday, November 21, 2010

DIY Christmas Decorations

With December just over a week away I thought I’d better get cracking on some Christmas decorations. Inspired by the origami I saw on a recent holiday to Japan, I thought I’d start by making a quick garland of 3D stars.

I trialled a few different types of paper and ribbon but found that the sheet of Cristina Re reversible paper I had lying around had the best paper weight to produce sharp points on the star.

This video taught me how to weave/fold a 3d star and I used strips of paper about 1.2cm wide by about 50cm long.

One sheet of Cristina Re paper made about 13 stars. Clear fishing line was used to string the stars together after puncturing a whole in each star with a sewing needle.

After practicing with a couple of stars, it only took about 5 minutes to make a star from cutting the strips to completing the last point.

If you like the stars but don’t want a garland then you could easily turn a single star into a tree bauble or use them to decorate gift wrapping.

I hope you enjoy this quick Christmas project!

If you found this post interesting why not send it to friends!! If you would like to receive updates from Design Detective Diary please join me on Twitter or Facebook. Click Twitter or Facebook Fan Page links on the top right of this page to join.

Sunday, November 14, 2010

How to combat post-holiday blues - make a dress!

I'm back from holidays and reality has certainly kicked into gear. The memories of our 6 week adventure have already given way to the mundane tasks of everyday life!

To combat my post-holiday blues I've thrown myself into sewing and anything crafty. This weekend I finished my first fashion project that didn't involve following a pattern!

I drafted the pattern (with the help of my sewing teacher Letty) from a picture I found of a Sportmax dress using a simple t-shirt template as the base. I had the silk and cotton lying around (fantastic to finally find a use from them!) and after a few mistakes and amendments... here it is! I think it turned out ok for a first attempt? What do you think? Here's the orignal sportmax dress


Saturday, September 4, 2010

Underground ARTMarket

I went to the opening of the Underground ARTmarket exhibition yesterday and was blown away with the quality of art work on show. The exhibition was buzzing as I checked out the amazing artwork from local painters, photographers and mixed media artists. I feel in love with so many pieces but with an overseas trip only days away I could only justify 1 early Christmas present (thanks, il mio) – a giraffe diorama by artist, Peta Morris.

The gallery did a great job at keeping the market vibe with tables as well as wall space displaying the artwork. I think this really helped to make the pieces feel accessible and probably contributed to the number of red dots on the wall!!!

This is only the second exhibition the gallery has launched and already it seems to be getting a strong following. My studio is next to the gallery space so many of the underground studio artists (except me, who didn’t finish anything in time!!!) were exhibiting with other local, emerging artists. The exhibition really says a lot about the artistic talent we have this side of the harbour bridge.

The exhibition is open until the 19th September and I’d highly recommend anyone who can access the gallery to go and have a look!

Saturday, August 28, 2010

World Trip - 14 days to go!

I'm only 14 days away from a 6 week holiday around the world.

It's been 5 years since we've been overseas so this holiday is long overdue. After a quick stop in Vancouver, we're heading to New York, London, Paris, Switzerland (Interlaken area), Milan, Kyoto and Tokyo. I've never been to the Canada, USA or Japan so a lot of this holiday will be a completely new experience.

I'm looking forward to discovering other crafters , sourcing places for inspiration, SHOPPING, finding flea markets and just taking time to chill-out.

If anyone has any "must-do's" for these cities please share! If anyone knows any interesting peeps who have shops, stalls etc. in any of the cities, pass on their details. I'd love to connect with them while i'm there....

ox

Friday, August 6, 2010

Skeleton

I've been wondering how long it would take a leaf to become a skeleton? This one I found today, hiding in a corner of our building. It's been protected from the elements and if you click on the image you can see the preserved, fine detail.....

Sunday, July 25, 2010

Retail Therapy

The French really are the world leaders of retail packaging. From the moment you select your purchase, your item is handled with love and care. It's gently folded and wrapped with the finest tissue and placed in a sumptuous carry case. The whole experience is done in slow motion, almost like a retailers version of Tai Chi.

I was recently given some gorgeous things from Paris. Each one folded, wrapped and presented in the most divine carry bags. I scanned the above image to show you one of the bags. I love the colours and patterns. The ink painting is so beautiful it's almost worth framing!

While I'm talking about Paris + retail. 2 of the Parisian shops I can't wait to visit on my holiday in September are Cafe Angelina and home emporium 'Merci'. Cafe Angelina is filled with french pastries and macaroons and Merci is located in an old textiles factory with plenty of homeware eye candy.


above images are from grazia magazine. www.grazia.com.au and Vogue Living http://www.vogue.com.au/vogue+magazine/vogue+living/

Monday, July 12, 2010

My Kind of Gentleman’s Club

I read about this trio a few months back and was very excited to see the article on them in Vogue Living July/August 2010. “Captains of Industry” is a retail space in urban Melbourne fusing the traditional skills of a tailor, cobbler and barber.


It’s the ultimate destination for bespoke suits, shoes and a short, back and sides. And if you aren’t too stunned by the uber cool interior, you can take a seat and enjoy a smooth coffee served just how you like it.

I genuinely wish I was a man so that I could engage the services of these talented men. I’d walk out putting James Bond’s suave style to shame.

Tuesday, June 15, 2010

Bower Bird


I found this leaf today as I walked along Pittwater, watching the boats in the last minutes of sunlight.

How can something that is decaying be so beautiful?

I love the colour, the texture and the patterns – especially the tiny black dots on the under side. If you click the images they should enlarge so you can see the detail.

Friday, June 4, 2010

A feather in her hair…….


i love the whimsical touch of feathers in the hair. This gorgeous girl is the writer behind the cherry blossom girl blog. http://www.thecherryblossomgirl.com/perles-et-plumes/11028/

Sunday, May 16, 2010

DIY Wedding Flowers

Left bouquet includes roses & deciduous foliage, Right bouquet includes Alstromeria & roses


I love the thrill of a creative challenge so when a good friend asked me to do the flowers for her wedding I jumped at the opportunity. I knew that I would be getting in a little over my head as I have no experience in wedding flowers but thanks to You Tube I think I pulled it off.

The bride’s background is Burmese and Indian so the flowers needed to be rich with colour and match a white wedding dress, red sari, a blue bridesmaid’s dress and a burgundy groom’s tie.

We decided on the colour theme and organized a trip to the flower markets to do a trial.


Colour theme included gold, apricot, burgundy, aqua, peach, red

I kept the designs very simple to ensure no hiccups and the final bridal bouquet included: Cherry Brandy roses with deciduous foliage (not sure what it’s called).

The bridesmaid’s bouquet included: Cherry Brandy rose, David Austin rose & Alstromeria

The button holes included: Vanda Mokara Orchid or Rose, Camellia Foliage & Dodda vine.

It was a lot of fun putting together the arrangements and I learnt a few things about floristry in the process.

The wedding was last night and it was a truly beautiful event.

The You Tube videos that helped me with the bouquet and button holes are listed below:

http://www.youtube.com/watch?v=ieP97FqZo5U
http://video.in.msn.com/watch/video/how-to-make-a-corsage/fyed32rk
http://www.perfect-wedding-day.com/make-a-boutonniere.html
If you found this post interesting why not send it to friends!! If you would like to receive updates from Design Detective Diary please join me on Twitter or Facebook. Click Twitter or Facebook Fan Page links on the top right of this page to join.

Monday, May 10, 2010

Sew Exciting !!!

My life has changed. No longer do I need to struggle to cut, sew and press handmade outfits in the living room of our one bedroom unit, I now have a studio space 100% dedicated to my creative explorations!


Project numero uno – plaid trench coat


Stay tuned for progress report...

Thursday, April 15, 2010

Exhibition: Light + Colour + Movement by Cade Turner


I'm very excited to announce my husband, Cade Turner's, FIRST solo exhibition entitled: Light + Colour + Movement.

This exhibition will be showcasing a series of unique Impressionist and abstract photographic artworks. Focusing less on the external reality which photography delivers, Cade explores the mystery contained within the raw elements of a scene – its light, colour and movement, using the camera more as an ‘Impressionist paintbrush’ to paint his photographic works with light.

Please join us for drinks between 6-8pm on Friday April 16
The exhibition runs until Tuesday May 4

Tuesday, April 6, 2010

Looks I'm Lovin'


I love the casual look of a men's style shirt teamed with loose fitting shorts. I also want those shoes!

this look is smart and sophisticated, I want it!

Chictopia is a fantastic source for inspiring outfits, and the above are no exception. I'm hitting the shops this weekend so the website is a good starting point for shopping list.

Saturday, April 3, 2010

Natural Easter Egg Dying

Final Product! See below for instructions...

Use sheer stockings to stick leaves onto egg shells and rubber bands to create interesting patterns...

Don't forget your apron! Rubber bands can snap and cause stains!

If you blow out the eggs before dying they won't sink!


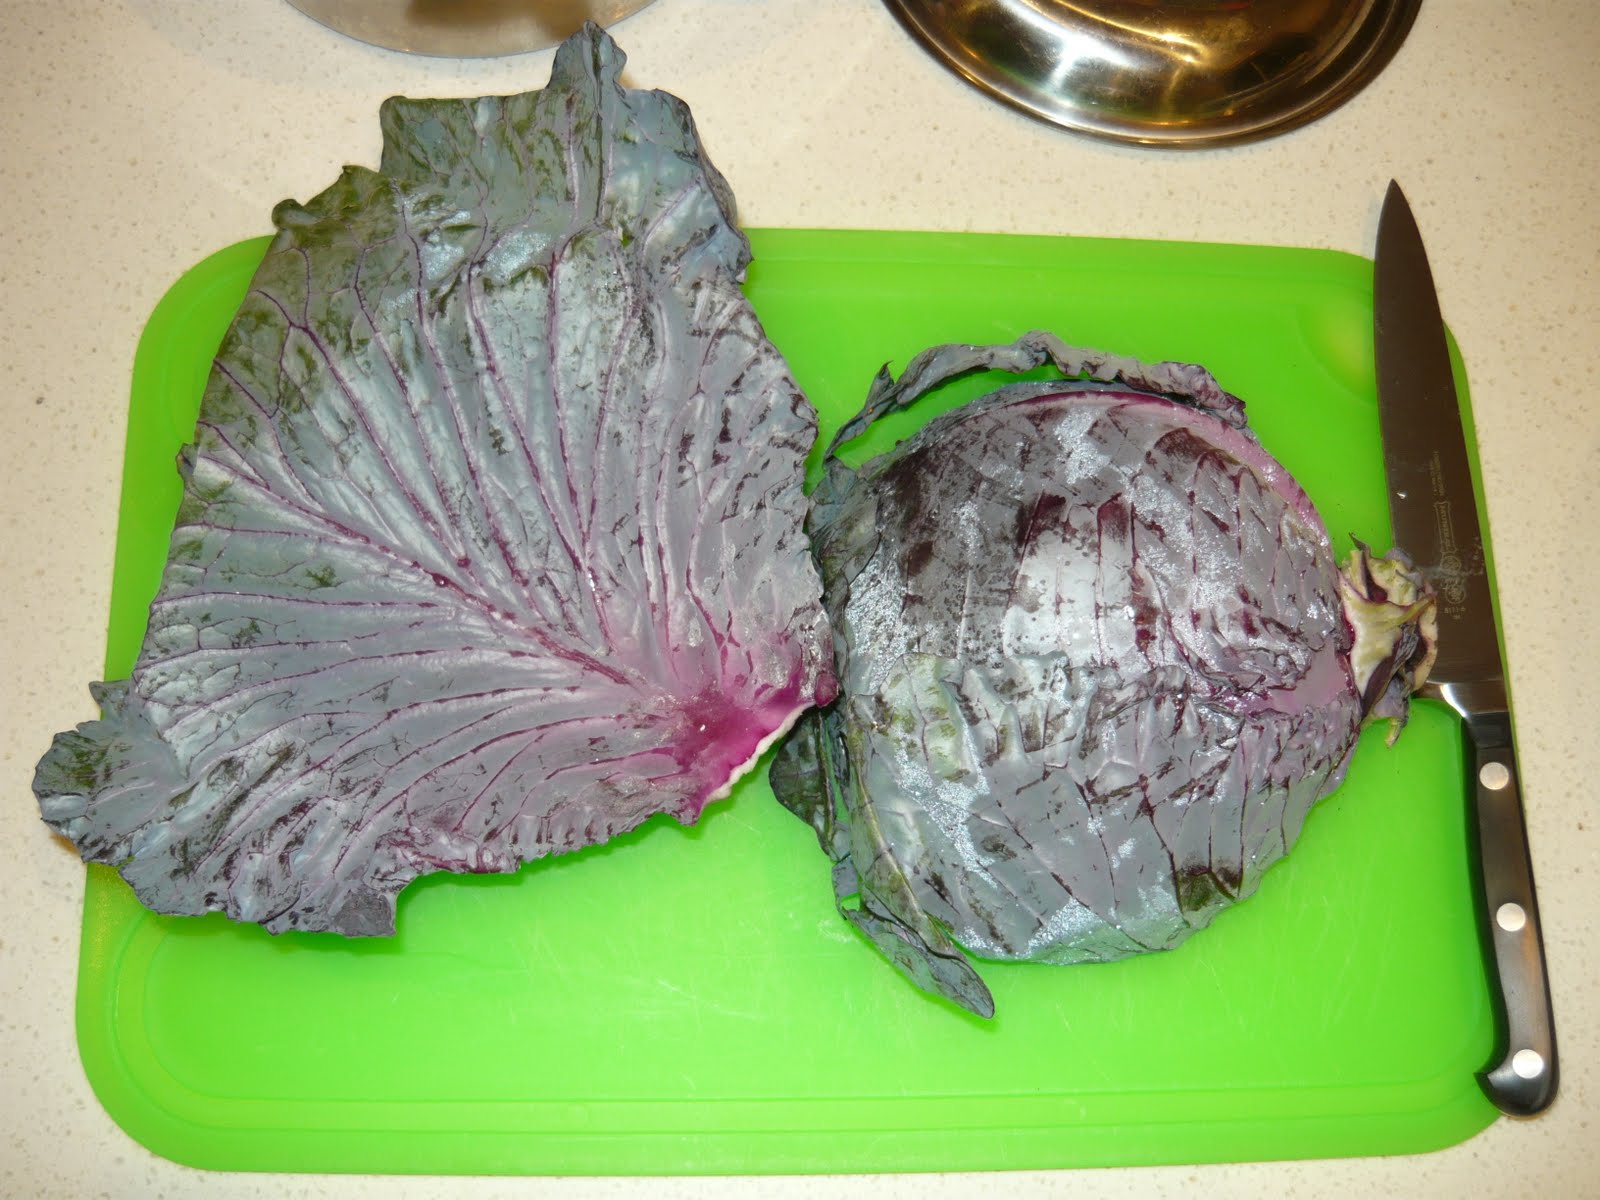
This post is a follow up from my blog the other day on natural egg dying. After a messy night, I managed to dye my eggs using 4 colours. Each colour was created from 1) Onion skins+tumeric powder 2) Coffee 3) red cabbage 4) Beetroot. To create some patters I used rubber bands, sheer stockings to stick down a leaf to some of the eggs and sediment from the chopped cabbage.

I wouldn't say the process was 100% successful. I thought I'd be cleaver and blow the eggs out before I coloured them (so we didn't have to eat boiled eggs for a week) not realising that this would prevent them from sinking into the coloured liquid! I also didn't realise that the colour would tear away from the egg if you touched the egg when it was wet. The coffee was a little weak (I used 3 coffee bags, but should have used about 5!) and the beetroot probably stained my clothes more than the eggs.

However, I had a lot of fun and look forward to using my eggs as a table display tomorrow.

Happy Easter everyone!
Kell xo
P.s. If anyone can shed some light on why I couldn't get the eggs to sink or tips on how to sink the eggs after they've been blown out, I'd love to hear your comments. Simply click the "comment" link below.
If you found this post interesting why not send it to friends!! If you would like to receive updates from Design Detective Diary please join me on Twitter or Facebook. Click Twitter or Facebook Fan Page links on the top right of this page to join.

I heart brogues....


Ok, so early last year I developed a slight obsession with the classic brogue. I hunted all over the shops, second hand stores and children’s departments to find a brogue that would fit however, with no brogues for women and a size 5.5 foot there were no brogues for this Cinderella.

Today my luck changed..... !!! ALDO footwear in Chatswood had just received a stunning women's brogue collection and I snapped up the above pair for only $79.95 (leather) !!

I love the suave style this shoe can bring to any outfit..... slightly masculine, yet uber cool (think Katharine Hepburn).
image from The Sartoralist

Wednesday, March 31, 2010

Easter eggs for the non-chocolate lover (yup, that's me!)


I could be wrong, but I don't think I'm the only human who dislikes chocoloate eggs. I know that some of you out there are thinking, "Freak!" but yes, non-chocolate eaters do exist!

To ensure I can still participate in the spirit of devouring an egg on Sunday, I've decided to try my hand at natural egg dying. Colouring an egg with natural dyes allows you to create some delicious colours and still be able to eat the end result.

Thanks to Whiteley Creek Homestead I now have some fantastic instructions on how to get started. I love the authors suggestions about using rubber bands and veggie sediment to create some interesting patterns.

Recipes for natural dyes are available through a number of websites, however the ones I'm going to use are listed below:

http://www.lakewinds.com/store/Natural-Egg-Dye-Recipes-W4698C18760.aspx

http://blisstree.com/live/heres-a-fun-one-for-you-organic-easter-egg-dyes/?utm_source=blisstree&utm_medium=web&utm_campaign=b5hubs_migration

http://crunchydomesticgoddess.com/2009/04/04/how-to-dye-easter-eggs-naturally-a-tutorial/

Enjoy creating!

If you found this post interesting why not send it to friends!!If you would like to receive updates from Design Detective Diary please join me on Twitter or Facebook. Click Twitter or Facebook Fan Page links on the top right of this page to join.

images from whiteley creek homestead and ohdeedoh

An image to inspire thought and creativity


The beauty of this image took my breath away..... it's like it's talking to you, telling you to let your thoughts roam free.

Click the image to enlarge so you can really appreciate the detail.

Artwork by Anthony Mattox

Tuesday, March 30, 2010

Kookai SALE - starts tomorrow (1st April 2010)


If a Kookai store triggers an O.C.D (obsessive, compulsive disorder) then you'll love this sale. 30% off all accessories, lingerie & sleepwear. Starts tomorrow.

Tuesday, March 16, 2010

Yes, This IS Glamorous


Life's been hectic and I've been staved of creative freedom and design inspiration for a number of weeks…. So the discovery of {this is glamorous} blog has filled my heart with so much joy!

Roséline, editor of this delightful blog has the eye of an eagle for inspirational objects. Each page filled with more and more images to tantalize your taste buds!

A profile piece was written on this creative minx by above the fray mag and can be viewed by clicking the following link

So, when you're looking for a pick-me-up I'm sure this is glamorous will not let you down!

(images from this is glamorous)

Sunday, March 7, 2010

A blogger taking drab to fab!

Occasionally I discover a blogger who astounds me with their dedication to their blog. Marisa, from New Dress a Day is one of these unique individuals. With a goal to spend 365 days with NO traditional clothes shopping and only $365 to make 365 items of clothing out of recycled items purchased from flea markets, garage sales, vintage stores or thrift shops –her goal is definitely no easy feat!

What’s more, this blogger is insanely gifted with the sewing machine. Her blog is definitely worth a visit to check out her amazing creations. A budget of a $1 a day doesn’t exactly buy you cutting edge fashion, but Marisa waves her magic sewing wand and takes drab to fab!

Saturday, January 30, 2010

Upcoming Exhibition


I’m going to declare my vested interest in this blog up front - one of the exhibitors is my husband Cade who (by my own admission), is a very talented photographic artist!

In February 2010, Cade and 3 fellow artists are opening the “Immerse” exhibition in the artisan hub, Danks Street, Waterloo.

Cade will have 7 new photographic works for sale, all with his signature impressionistic style – a focus on light, movement and angles.

Cade has been exploring this style in great detail for about a year and a detailed article about his journey can be found at http://www.cadeturner.com.au/news.php by scrolling down the page and clicking the image next to “impressed with impressionism”. – It is well worth a read.

Sunday, January 24, 2010

Tantalizing Tights


Ok, I know we’ve been in a 40 degree heat wave but I came across this fantastic (and simple) DIY fashion project that needed to be shared.

Kelly, from Lions, tigers & fashion, oh my! is a blogger who I follow regularly. Kelly’s relaxed and unique fashion style mixed with her creativity for transforming clothes always provides me with endless inspiration.

A post from last month shows her transforming a pair of sheer tights into a gorgeous pair of heart leggings. Such a simple idea with some amazing results. If you don’t have a steady hand you could always use a stamp with fabric paint. All images from Lions, tigers & fashion, oh my!

Wednesday, January 6, 2010

A picture's worth a thousand words

I’m always amazed at the number of techniques that can be employed for a simple photograph. Even a little point and shoot camera can produce professional quality shots with a click of a button. The profile shot of me on this blog was taken on the base model, point and shoot Panasonic Lumix camera. I'm a complete novice when it comes to photography so I've set myself on a quest to find inspiration for a few basic techniques.

World renowned fashion photographer, Solve Sundsbo used interesting shadows to create these animal like prints on model Edita Vilkevicute. I'm now on the hunt for some funky shadows to try!!
A slight movement of the lens probably created the gorgeous “raining fire” chandelier display of lights in this photograph. This image looks so magical.
I love the look of a blurred background with a sharp detail in front. This was probably created by using a slightly slower shutter speed when the train went past. If the train was further away the effect could have been created by increasing the aperture size as well as slowing the speed.
Related Posts Plugin for WordPress, Blogger...